Have you noticed that a process named LockApp.exe constantly running on your PC? Well, don’t worry about it, it is quite normal. This LockApp.exe is actually a part of the Windows 10 operating system and as well as, it is also responsible for representing the lock screen.
However, we have seen certain processes in windows that can be manageable somehow, and some of them are accessible to be skipped away. Let’s take an example of the lock screen of Windows, this lock screen is the interface which you can see just right after booting your system.
It also comes just before the screen at the moment where you type the needed password and then log on to the computer. Obviously, you can see the lock screen all over to your face, but the truth is that it is all running by the lockapp.exe.
Yes, this is actually one of those processes, which we can’t see, or even think about it. And that’s why we are here to show you what is LockApp.exe on Windows 10? How to disable it easily as well.
What is LockApp.exe on Windows 10?
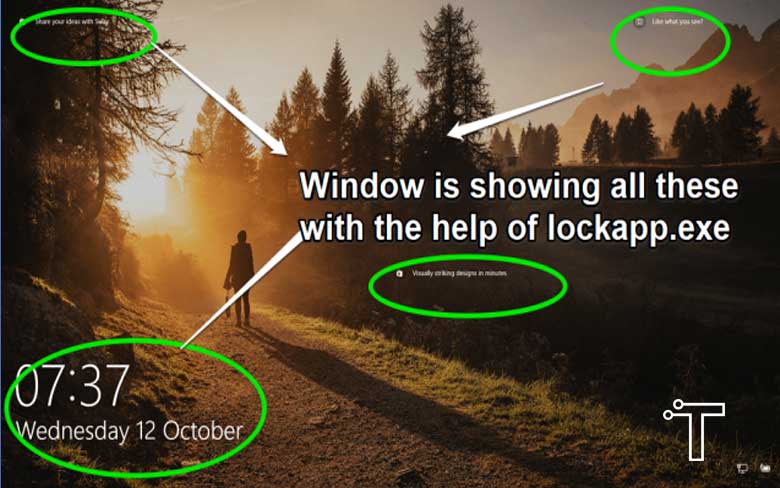
In simple words, the LockApp.exe runs the lock screen of your Windows PC, and with the help of this, you can able to watch the background image, date, and time on the lock screen of Windows 10.
Technically, the purpose of LockApp.exe in the Windows is to show further the lock screen overlay that you can see just before the moment of your sign into your PC.
This lock screen shows you everything you have selected before, like a background image, date/time, and even some “quick status” items as well. For example, you can be able to even to set up display weather forecasts or even any kind of important information you like to see at first when you switch on the PC.
So, that’s how the LockApp.exe process begins to displays everything on this screen. This process is actually not doing any of its work most of the time. However, it purposely does its work just at the moment when you are at the lock screen.
By default, this lock.exe file will be found in the location of below directory “C:\Windows\SystemApps\Microsoft.LockApp_cw5n1h2txyewy”.

Furthermore, if the LockApp.exe file has come while located in another folder, then the chances are having malware running on your PC. Though, if you really want to sure that this LockApp.exe is not infected, then you need the scan the lockapp.exe with your antivirus.
Scan LockApp.exe Method:
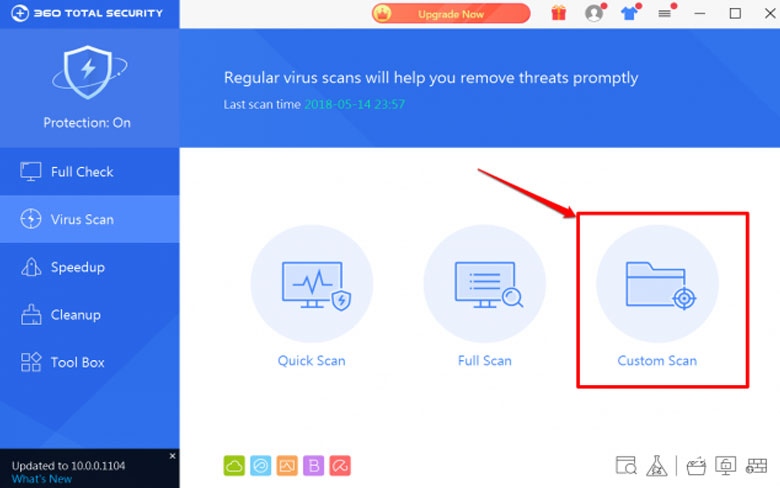
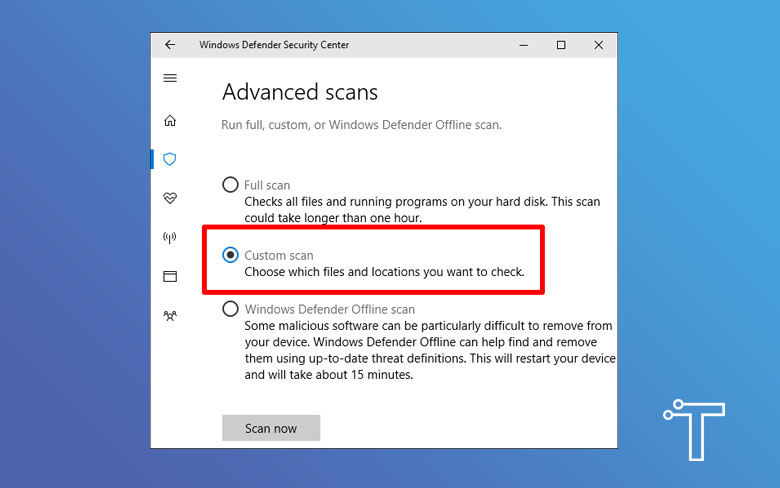
- Like if you are willing to scan the file through your Windows Defender program, then go and search for Windows defender in the search menu.
- Then, simply go for the option of Advanced Scan and further select the ‘Custom Scan” option and after this, go with the process of scan lockapp.exe.
How to Disable Lockapp.exe in Windows 10
Disabling the actual process of lockapp.exe would make your logging into your computer really faster, even though, you will be logged in just within seconds or so.
When you disable the LockApp.exe file, it will eventually erase the lock screen page and of course, will help you while taking you straight to the interface, where you just need to put your password, and that’s it.
However, if you are not sure or maybe not familiar with registry editing, then you need to read our below guide, where we provide you with all the steps and needed the information to disable lockapp.exe.
The following steps will help you while showing the process of enabling or disables the lockapp.exe.
- On your windows, GUI, you need first to open up the start menu and then simply type “Regedit”.
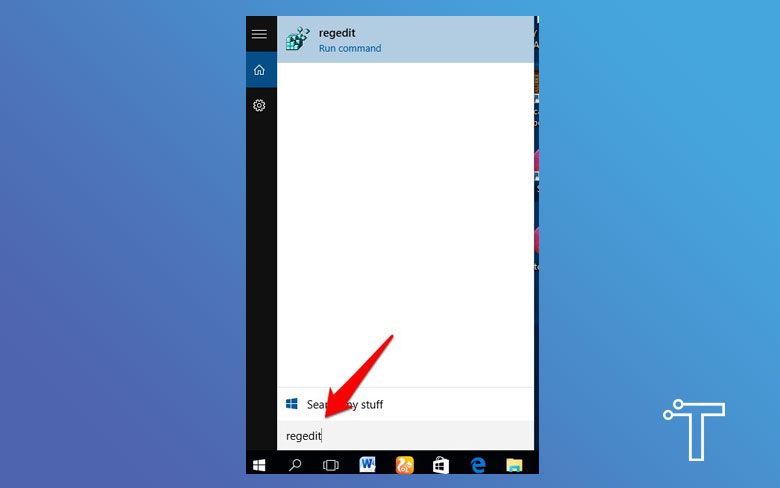
- After that, you will see that a user account control tab along with the statement of “Do you want to allow this tab to make changes to your pc” windows will be appearing onto the screen, you need to click Yes so that it can open the registry editor.
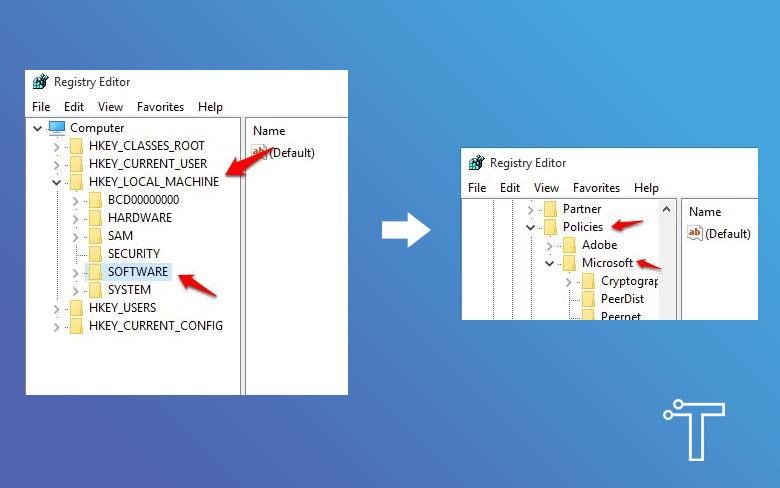
- Once it gets to open, go through the left pane, check out for the HKEY_LOCAL_MACHINE, and then click on the arrow that you can see beside it.
- Then, there would have appeared a drop-down menu along with various options. You need to further click on the beside arrow of HKEY_LOCAL_MACHINE, via the drop-down menu, then go and click on the arrow that you can see beside software.
- From software, go to policies, and on the policies, you need to click again on the arrow beside it so that you can easily reveal the Microsoft folder.
On windows, just simply click on the personalization key. In some cases, we have seen that there is no personalization key available. So, if you find similar to this, then simply right click on the windows button and further navigate on new.
And that’s how you can create your own new personalization key. But of course, don’t forget to create a “personalization key” set it as the name.
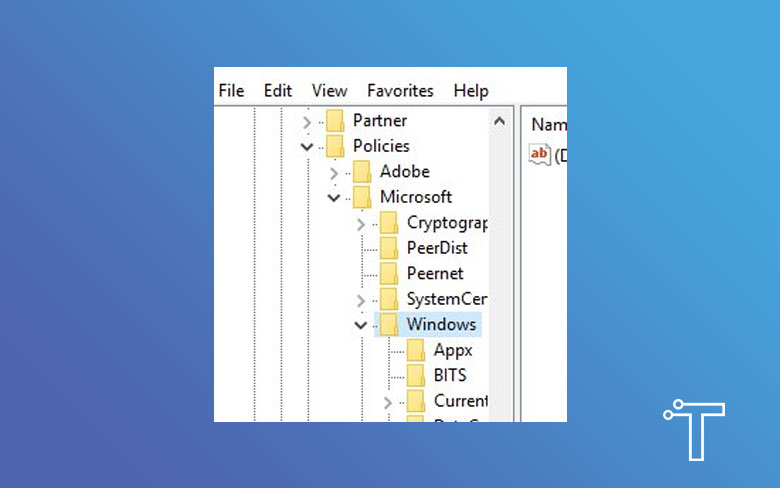
Then a new personalization key will be able to update onto the pane.
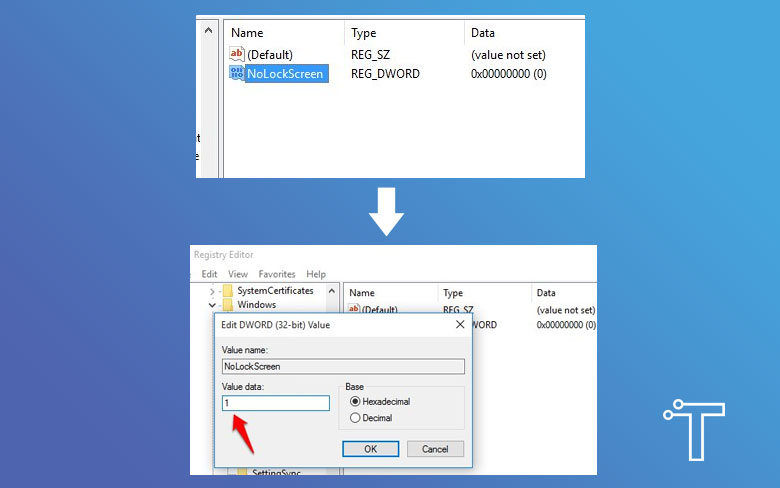
- So, once you have done with this step as well, go and right-click on the empty space, which you can see in the right pane to further create a new DWORD value.
- Then put it the name of No lock screen.
- Simply get a double click to the “No Lock Screen.”
- Change it out the value data to 1.
- And once your changes would be done, the lockapp.exe will automatically be disabled.
- And if you want to enable it again, just change the value data from its 1 to 0, or you can also delete it altogether.
Conclusion
See, the process of disabling lockapp.exe is really very simple, you can easily disable and enable the lockapp.exe without any more complications or hassle. So, enjoy your changing now, and don’t forget to share your experience with us in our comment section below.
Keep sharing the information with your friends and family so that they can also know what is LockApp.exe on Windows 10? And how to disable it…