A screenshot is a capture of whatever is on your screen. Do you know the ways to take a screenshot in Windows 10?
Taking screenshots in Windows 10 is a piece of cake. Windows 10 contains some built-in functions that are useful for taking screenshots, and there are some applications appropriate for capturing screenshots as well. There are many ways to take a screenshot.
Taking Screenshots with PrtScn
The PrintScreen option can help you take a screenshot in many different ways. You can take a screenshot and store it in your file, you can take a screenshot and not save it, or you can just take a snap of a single tap as an alternative of the entire window.
The Print Scr button is located on the right top side of a keyboard. Once you press the button, you will not get a notification about the screenshot, but the screenshot will be automatically saved on the clipboard.
How to Save the Screenshot as a File a PC, press “Windows logo key + PrtScr.” But, on a tablet, you would have to press the “Windows logo button + volume button.” However, some devices have a different code for taking screenshots, some require “Windows key+Ctrl+PrtScr,” and some just press Fn instead of the Ctrl key, in the same combination. For further information, it is always best to read your PCs manual to know the combinations.
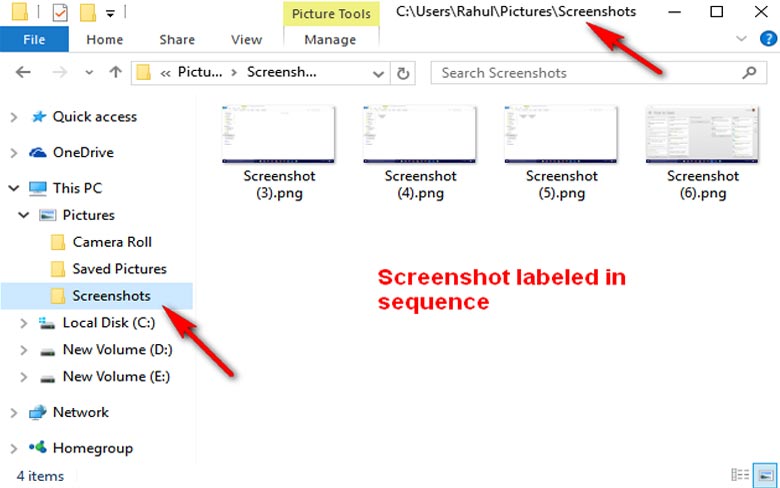
The moment you take a screenshot, the screen becomes dim for a few seconds, and all of your screenshots will be contained in a folder labeled “screenshots,” in the submenu of the default “Pictures” directory.
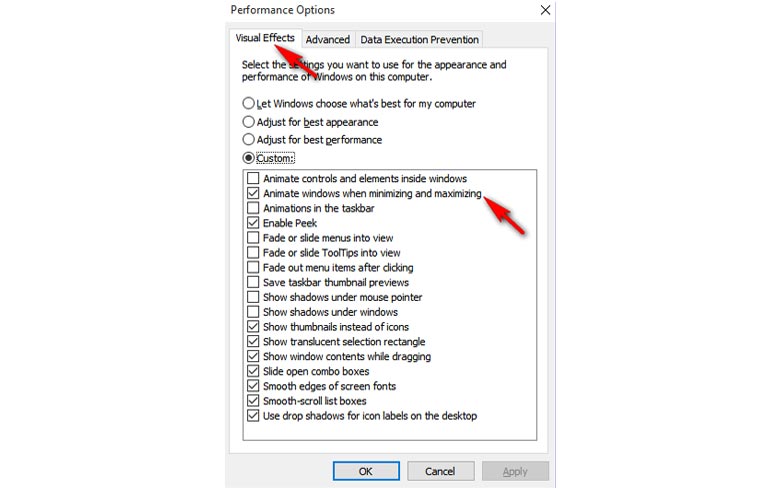
The dim screen effect only happens when your PC’s settings include “Animate windows when maximizing and minimizing” selected to be on from the visual effects functions; System ->Advanced system settings ->Click on the Advanced tab -> Click settings from the Performance area.
How to Take the screenshot and not save it
First of all, just go with the simple method of taking a screenshot – the PrtScr. Your screenshot is now taken and transferred to the clipboard.
After that, just open your most preferred picture editor or wherever you want to use the screenshot in and click edit and paste your screenshot in it. According to the dimensions of your laptop, the screenshot will contain the same number of dimensions.
How to take the screenshot of one Window
The cursor to the title bar of whichever window you want to take a screenshot of. Press the “Alt+PrtScr.” A screenshot will be taken and transferred to the clipboard. Now, open your most preferred image editor and paste the screenshot in it.
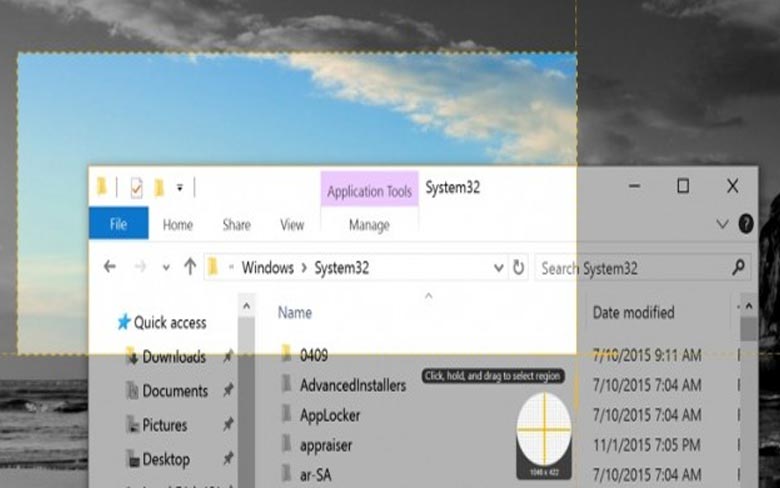
How to take the Screenshot of entire or part of the screen
First of all, press the “Windows+Shift+S” keys. The screen will become dim, and the icon of your cursor will modify. After that, just click on the portion you want to take a screenshot of and drag it to change its position and take your screenshot.
How to Take Screenshots a Snipping Tool
The snipping tool has always been in companionship with Windows. It was first featured in the Windows Vista, but it never got updated with brand new features except to deal with some bugs. You can take screenshots with a snipping tool, regardless of the area.
The Snipping tool used in Windows 7 and 8 cannot take screenshots while the mouse is moving. If you want to capture mouse movements, tooltips, and menus, then Print Screen is your only option.
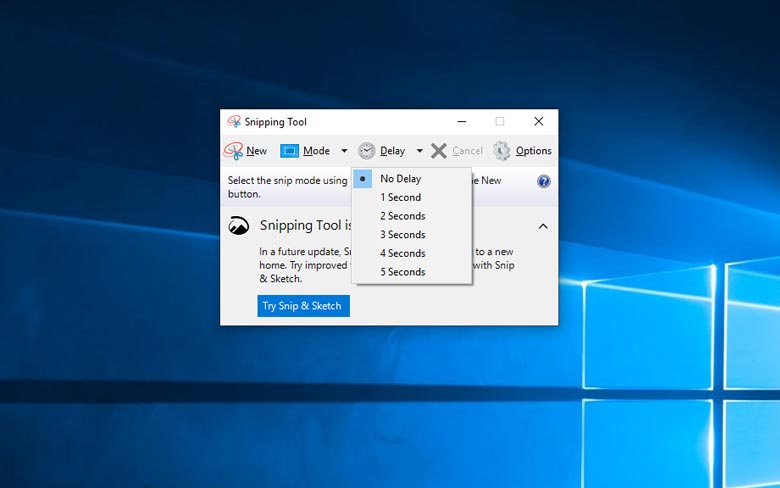
In Windows 10, there is a feature called “Delay” in the Snipping Tool, which lets you take screenshots with tooltips and pop-up menus. Just open the snipping tool and click on delay, your screenshot will be taken in a few seconds.
The next thing you have to do is just select which type of snip you want to create. There are four kinds of snips: Windows, full-screen, rectangular, and free-form.
How to Take Screenshots with Shortcuts for Gaming
10 is an expert when it comes to unique DVR features for recording gaming footage and for capturing screenshots for gameplay. With this method, you can take screenshots in the famous PNG layout and save your screenshots in the C Drive.
Before you begin to boot the Game Bar, it is important to start the Xbox application that is featured in Windows 10’s settings. You will find the option “Take Screenshot used with Game DVR” in the “Game DVR” section, and just any keyboard shortcut for taking screenshots.
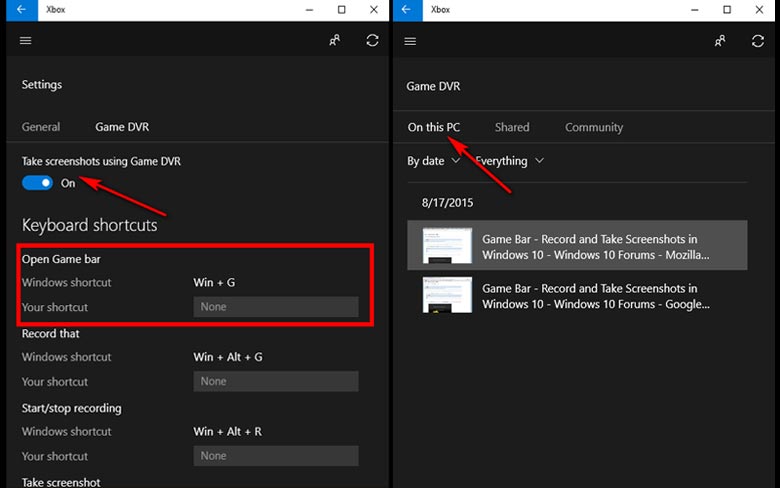
Combinations used for gameplay screenshots are Windows logo key+G” and then click the option “Yes, this is a game” and succeed. After that, press the “Win+Alt+PrtScr” to take a screenshot finally.
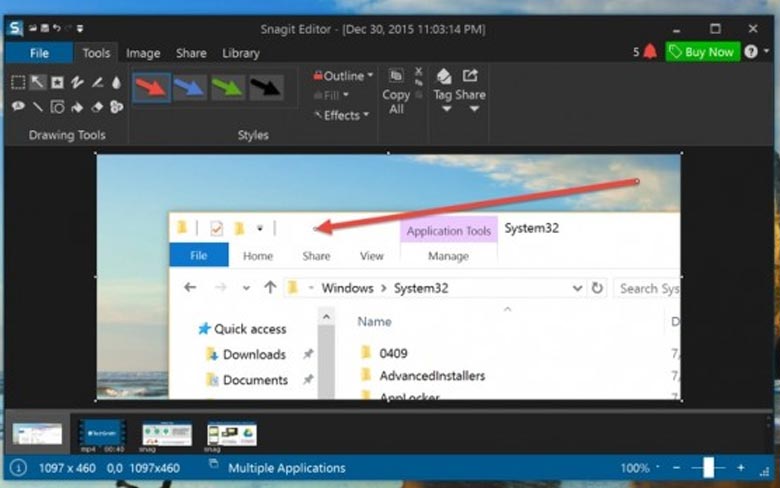
How to Take a Screenshot with Snagit
There are so many built-in processes in Windows for taking screenshots, and each has its benefits and cons. If you are the type of person who takes a lot of screenshots and demands an easy and more flexible way of taking screenshots, then there is a very reliable tool available for you.
If spending a couple of dollars is no big deal for you, then choose Snagit by Techsmith. Snagit is a very reliable tool that specializes in taking screenshots, and it is very easy to use. It contains a variety of different features and can take screenshots in any way.
Snagit, you can take screenshots of the entire window, specific portions, tabs, Gameplay, etc. You can even take full screenshots of scrolling web pages.
You can even capture videos, edit screenshots, draw shapes and arrows, and do anything you want with the screenshots, as long as you do it with Snagit. This tool is very helpful for those who take screenshots a lot for various purposes.
We recommend everyone to use Snagit for having a wonderful screenshot-taking experience. What’s more? Snagit doesn’t even have complicated controls; it is very easy to understand its features. So, chose which method you find more convenient.