Owning an eCommerce business means that you need to handle many factors that change how your company operates and whether or not you’ll find success with it. One of those factors is shipping.
Shipping handles the physical aspect of your online store of handling and delivering your products to your customer. Some may even argue that shipping is a necessary component of your business, as, without it, you cannot succeed.
Therefore when it comes to utilizing WooCommerce for your e-store, it’s essential to consider its shipping capabilities. And while WooCommerce has some basic shipping options, they are simplistic and limited.
That is why it’s best to utilize additional plugins such as WooCommerce Table Rate Shipping that enable the creation of in-depth shipping rates that can satisfy all the needs you might have.
How This Plugin Can Help You?
The ability to create advanced shipping rates can be crucial in maintaining a healthy business because they can supplement additional costs you may incur when dealing with long-distance deliveries. And as WooCommerce Table Rate Shipping has both regional and local zones, you’ll specify how precise your rates will be.
Also, this can be especially important for managing delivered to countries that span an entire continent, such as Australia or the United States.
But first, let’s look at one of the simplest and most effective methods of handling shipping: charging by item count. It’s a great way to charge for items sold in bulk and don’t require special handling, such as fragile or weighty items.
In these few steps, you’ll be able to create a shipping rate that’ll suit your business perfectly.
1. Create a Shipping Zone and Add a Shipping Method
The first step is straightforward: navigate to your WooCommerce settings and select the Shipping tab. This is where you will choose the geographic zone where your products will be shipped. To do so, click the ‘Add shipping zone’ button, which will take you to a new menu where you can configure your basic zone details.
These zone details include the zone name, region, and shipping method. It’s recommended that the zone name corresponds with the region you want to use. That way, you won’t have issues organizing your zones, which helps manage your overall business efficiency.
Next, you choose what region you want your zone to encompass. You can choose from entire continents to specific countries. All you have to do is write your desired location into the text box, and the plugin will find your desired region.
Suppose you require a much more specific region. In that case, you can also click the ‘Limit to specific ZIP/postcodes’ button to further specify where you want your shipping rules to be applied.
When you’ve chosen the region in which you want to apply your shipping rates, your next step is to decide what kind of method you wish to use when applying your shipping rates. This is a crucial step as this is where you need to choose Table Rate as your preferred shipping method. That way, you can create customizable shipping rates that suit your business.
2. Create a New Rate
Now that you’ve created your new shipping method, you can edit it to fill in the details. You can do that by editing the Table Rate shipping method you added in the previous step.
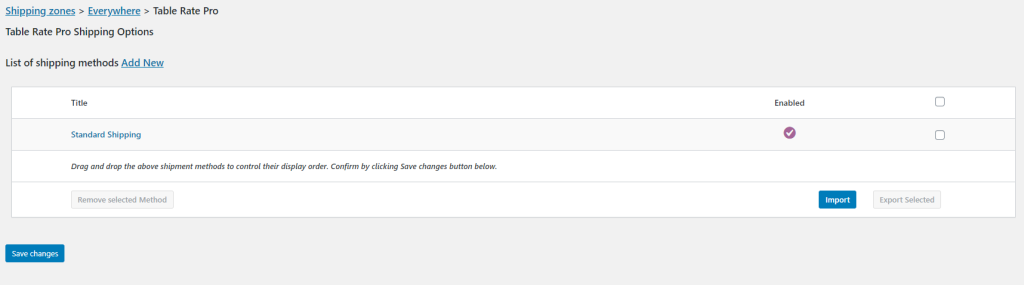
The following step is to enter the editing screen and create a new rule. To do so, click the ‘Add new’ button next to the text marker ‘List of shipping methods.’
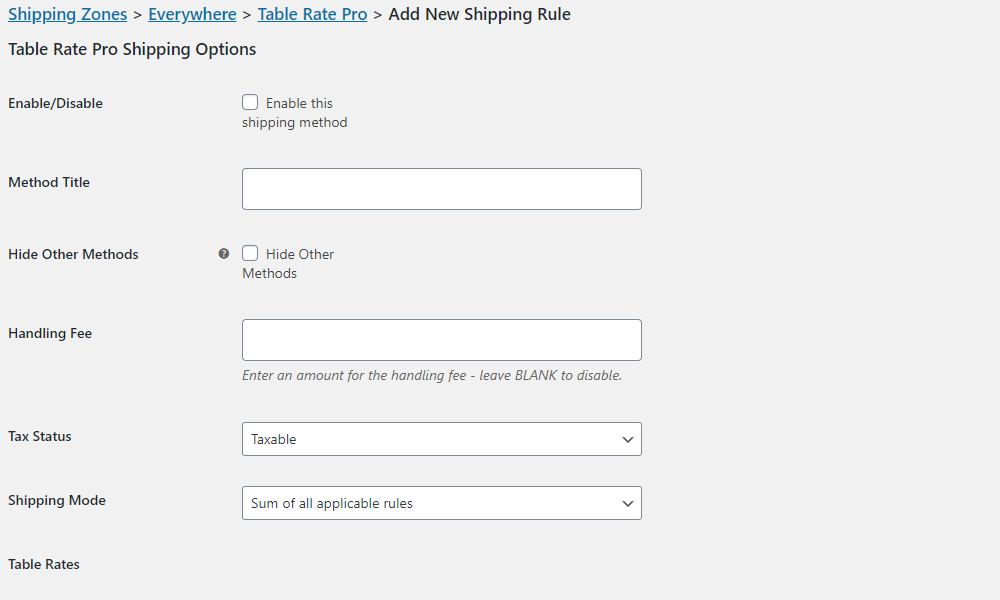
Once you enter the new menu, you need to name your new method, which you can do next to the ‘Method Title’ indicator. Afterward, ensure that it applies your method by pressing the ‘Enable this shipping method’ button.
Up until now, all the steps you’ve taken were oriented toward organization and management. However, from this point on, you’re going to be working with financially related options, so make sure to take care when you’re filling them out.
Handling fee
After you’ve named and enabled your new shipping rule, it’s time to choose a handling fee. Handling fees can be pretty significant if you’re dealing with a product that requires additional effort in creation and delivery before actually arriving to the customer.
With them, you can supplement additional fees you might encounter in transport or organization, and as such, you’ll be able to ensure that your profit margins stay stable. If you feel that you don’t need a handling fee, you can just leave the box blank and focus on other factors.
Similarly, you can select your shipping’s Tax Status, which is a simple Taxable or Non-Taxable drop-down menu. Make sure to choose the option corresponding to your local rules and regulations.
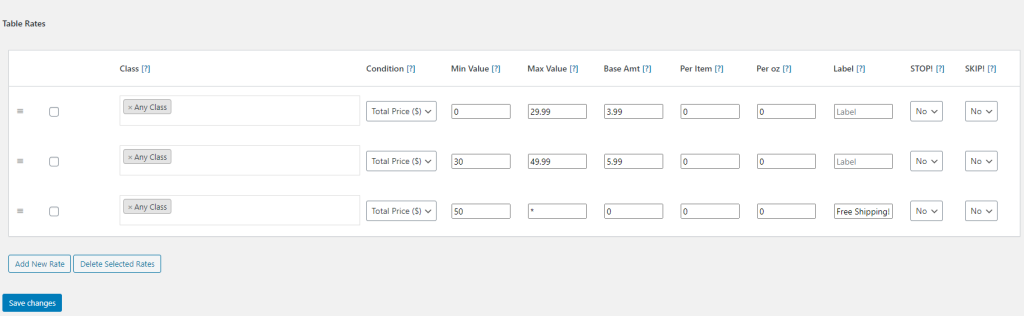
Now that you have your basic options covered, let’s create the rule to manage your shipping rate. You do that by pressing the Add New Rate button in the Table Rates section. This will create an empty ruleset that you then customize to your specific needs.
With this new rate, you need to choose if it will apply your rule to a specific class. Also, this means that you can choose if some specific types have this rule. You can also select the ‘No Class Set’ option that applies your rule to all products set in particular categories.
It is recommended to start with many classes and types that divide your product base. You also have the Any Class option if you have many shipping classes that you want to ship at your new rate.
Item Count Condition
Next, you choose the condition that would apply to your rule. Here you have multiple options, but if you want your shipping to be charged by the item, you need to choose the Item Count Condition.
Furthermore, this means that when you enter other values of the rule, they’ll be applied to the number of items in the shopping cart instead of weight or total price. Afterward, you can enter the minimum and maximum values at which your rate will be applied.
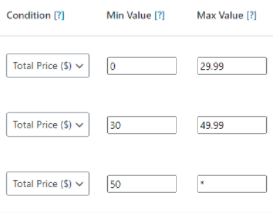
The plugin will recognize the number of items in the cart and use the ruleset if necessary. To make this rule applies for every item in the cart, you need to set the minimum value to 0 and the maximum to * (the asterisk symbolizes infinity, so you don’t risk reaching the maximal shipping rate).
Also, it makes no difference how many items your customer has in their cart with this method, and it can apply your rates without any problems.
The Base Amount
After you’ve applied the condition to your shipping rate, you’ll need to configure the actual price rates that will display on your store’s checkout page. You do this by entering your desired price rates into the Base Amount and Per Item boxes. The Base Amount box represents the charge rate that applies to every order.
That way, you have a baseline rate that’ll go through with every purchase regardless of the actual number of sold items. Furthermore, the Per Item box specifies the charge rate applied to each additional item in the customer’s shopping cart.
For example, you can set your base amount to be $10 and your per item to be 2$. That way, if a customer decides to purchase four things, your shipping rate total will be $18.
And finally, make sure to save all of your changes, and that way correctly apply your shipping rate.
Conclusion
Keeping track of your shipping rates is essential for running an e-store. After all, you can’t have a business if you don’t deliver your products to your customers. Another important aspect is keeping an efficient track of all of your orders.
This aspect grows in tandem with the growth of your business, so creating an efficient method of organization is key to success. And one of the best ways to organize data is to use programs such as Excel, so utilizing plugins such as WooCommerce Order Export can be vital in making that experience easy and efficient.
Usually, you get a jumbled mess of data when you try to export orders or shipping rates. However, with this plugin, you can shape the table before you ship it and have it already finished by the time you click the export button.
Staying on top of the eCommerce market is a challenging game, but you can achieve unprecedented growth with a bit of help from necessary plugins that streamline your workflow.